Today we are going to design a Premium Vintage Badge in Illustrator. This is a very easy step by step Illustrator CS6 tutorial for beginners. The final result is down below:
Premium Vintage Badge in Illustrator CS6 | Tutorial For Beginners
So lets get started.
First open illustrator and then go to File > New and make a new document. Width and height will be 4 inches. Set the units to inches and for printing purpose set the color mode to CMYK by clicking on the advance button, for web usage set the color mode to RGB & do not forget to uncheck ( align new objects to pixel grid ) rest remains the same.
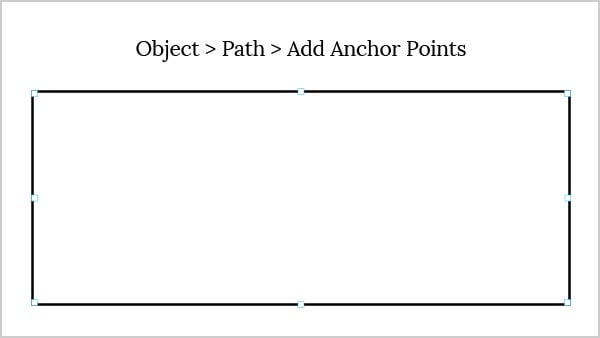
Press (M) which is a rectangle tool, click anywhere on the document & a popup window will come up, now insert the values: width 2.5 inches, height 1 inch.
Now go to Object > Path > Add Anchor Points
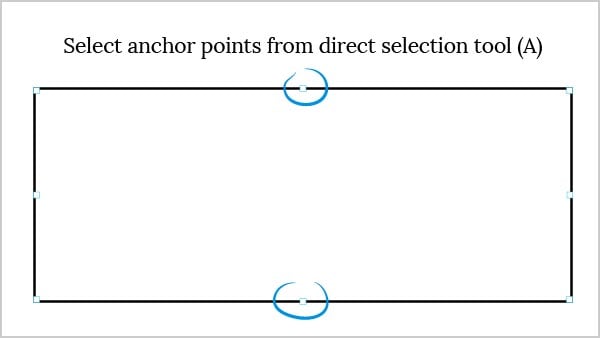
Now select anchor points from direct selection tool (A) while holding down shift key
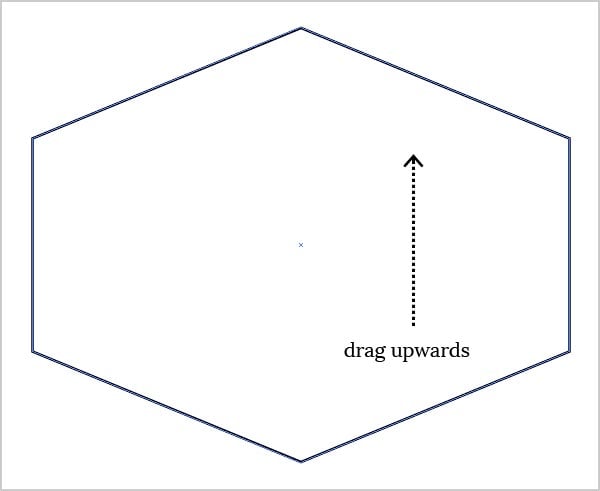
The tricky part comes here, after selecting anchor points press (S) Scale Tool & drag upwards while holding down the shift key on keyboard, your shape will look like this
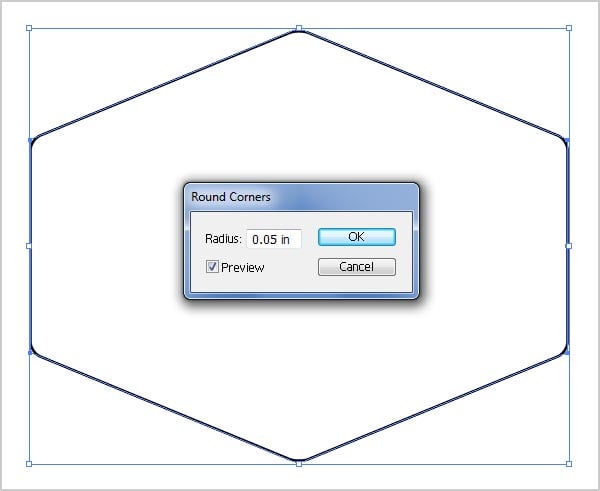
Now go to Effect > Stylize > Round Corners set the radius to 0.5 inch
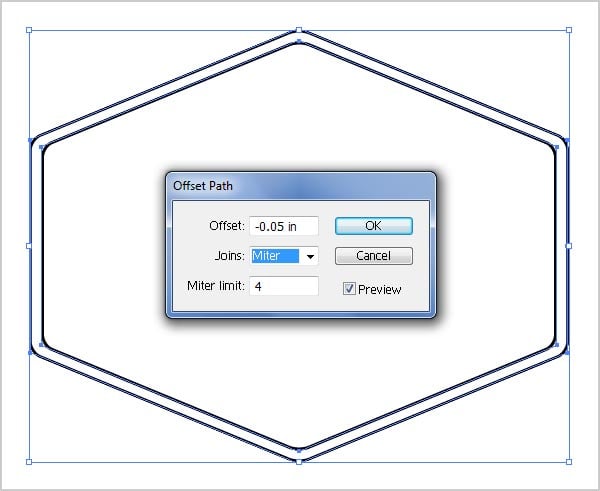
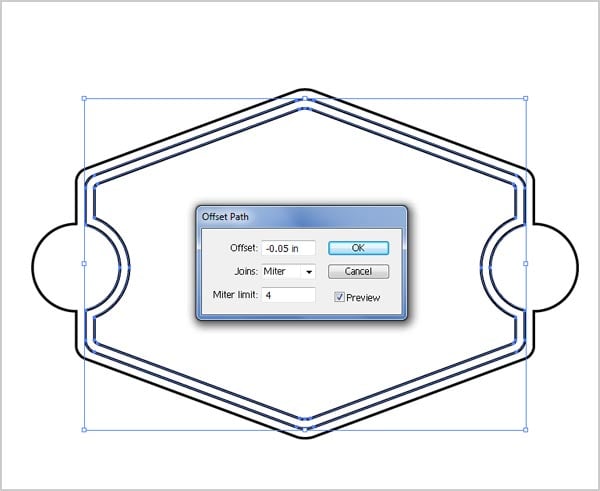
Go to Object > Path > Offset Path
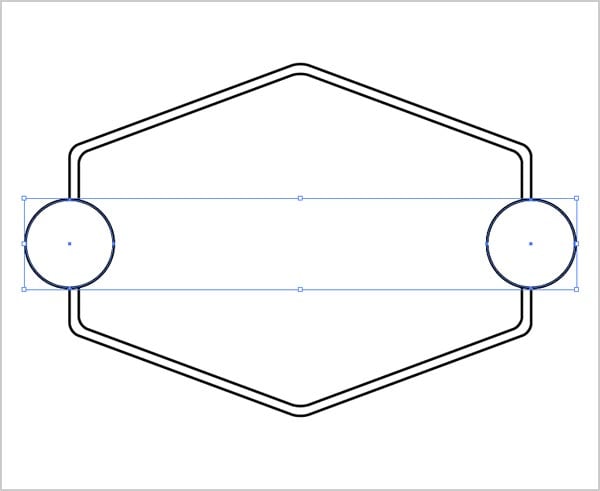
Put in offset value -0.05 and rest remains the same just hit ‘ok’. Now draw circle from eclipse tool Press (L) and draw two circle with same width.
Ctrl + G to group them to make a single object and align them centered. Make sure snap to guide is on. Follow the image below.
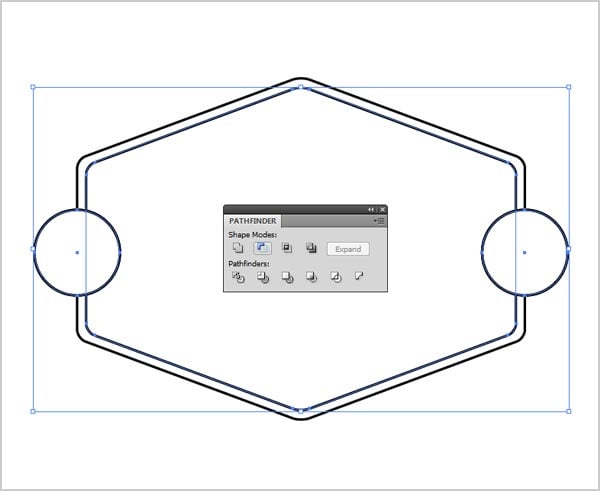
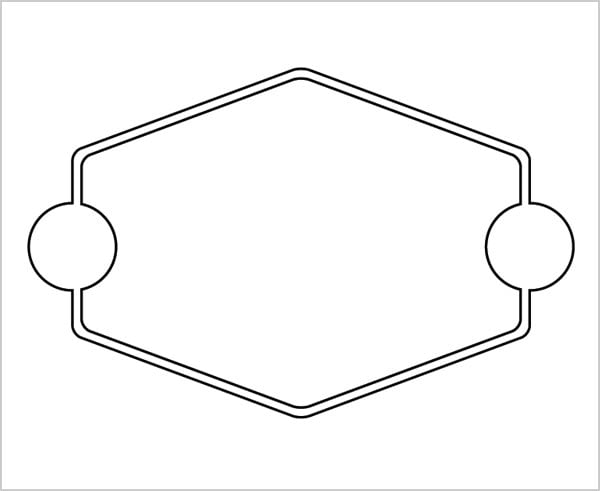
Make a copy of grouped circles Ctrl + C then Ctrl + F to paste in front, now subtract the inner object use path finder and make sure you select grouped circle and inner object. Both objects should be selected then Hit Minus, same goes with the outer object Hit Unite through path finder dialogue box. If it’s not visible go to Window > Pathfinder. Follow the image below.
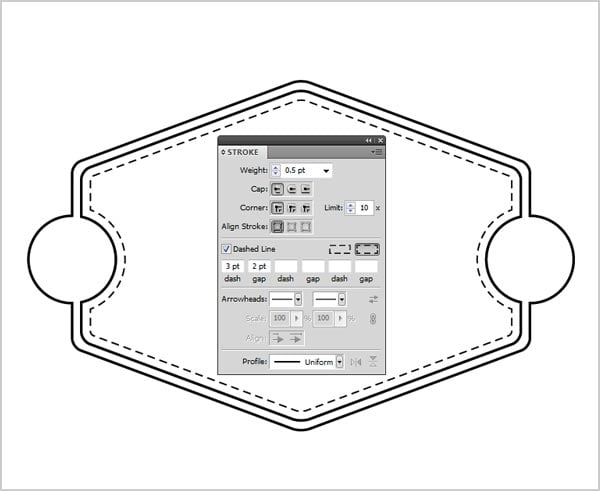
Let’s make a nice dashed line inside & then we color the object, we are half done here. Select the badge inner object and navigate to Object > Path > Offset Path. Values are given below:
Now do some outline settings weight 0.5 pt. Select dashed line (3 pt dash & 2 pt gap) & third one is to select ( align dashes to corners and path ends, adjusting lengths to fit ) option
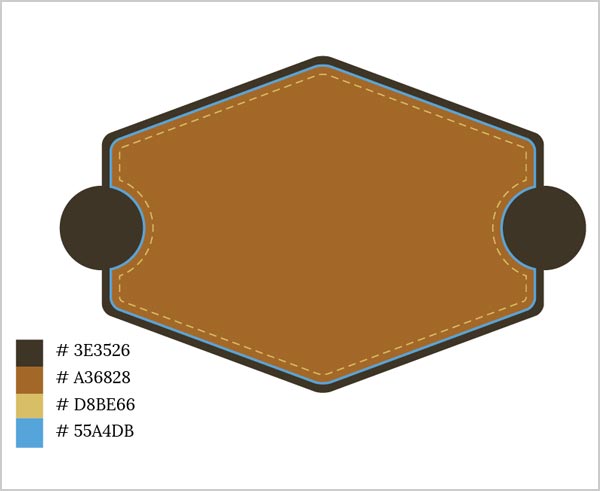
Lets make some colors I’m using these hexadecimal colors in the image below;
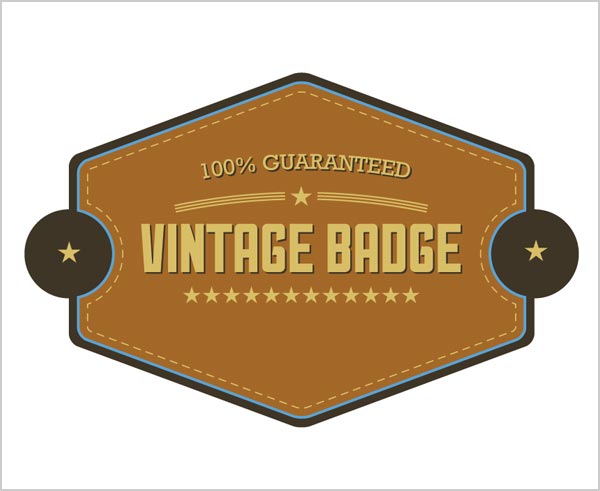
Now add some text & decorate it with stars and Vintage Elements. Follow the image below.
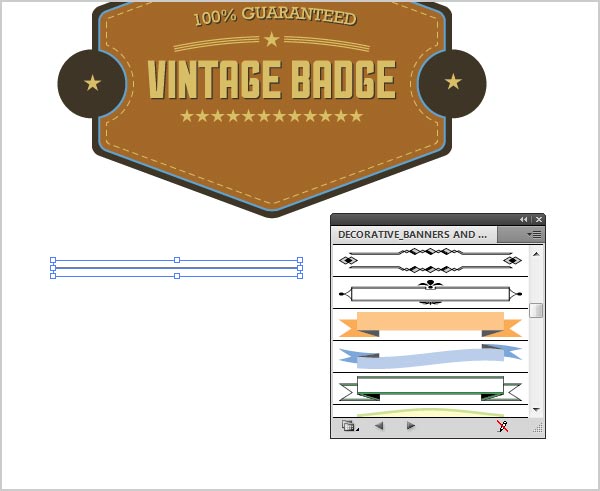
For drop shadow i used Ctrl + C & then Ctrl +B to paste behind. From arrow keys in keyboard I placed it a little bit on the right and downside. Now I am going to design a banner, first go to Window > Brush Libraries > Decorative > Decorate Banners & Seals
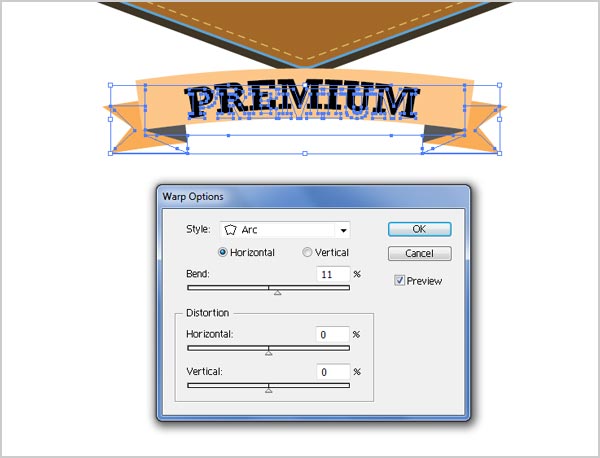
Draw a line and just click on the light orange banner, adjust the stroke width according to your requirement right now I am using 0.5 pt stoke. Write something on it and then we shall give it an arc effect through wrap options. You can find the wrap option under Effect > Wrap > Arc
Use the colors provided and give it a premium look. I hope you might have followed me step by step. I made this Illustrator tutorial quite simple and easy even then if you meet any difficulty in understanding any step; feel free to comment.
You can download the vintage badge from here
More Photoshop & Illustrator Tutorials:
- 25+ Best & Latest Illustrator CS5 Tutorials Of 2012
- 20+ Best & Latest Photoshop CS5 Tutorials Of Photo Effects 2012
- 20 Best Easy & Useful Illustrator CS5 Tutorials For Beginners To Learn in 2012



Hey 2 questions.
1. Whenever i try to minus the inner shape and the two cirles the two circles dont hold their shape and come out in a very warped shape. i dont have this problem with the otter shape and the circles uniting them.
2. How do you change the colour of the banner?
Thanks
nick
1. You need to first expand the appearance & then minus the object. Shape will not distort.
2. Again Expand the appearance after making the banner and then ungroup it (CTRL+SHIFT+G). Now select the object and change the color.
I’m expanding the appearance but it says that “The filter produced no results. Please select two intersecting paths.” What should I do?
Kindly select the object you need to intersect there must be some extra layer so kindly delete it first and then intersect or unite the object.
im having the same problem as katherine and nick. your tutorial stops there because it doesn’t work like you said.
Jay please share where are you stuck?
Hi, I had the same issue, where the rounded corners get applied to the innner offset path after using pathfinder. Expanding the appearance resolved this.
Thanks for the suggestion!
For those stuck, i had the same problem… I couldnt minus the two paths. I had to expand the appearance of the inner offset path and the outer path. After that i had to go into the newly made groups for both paths and delete a layer that had nothing in it. After that, i could minus the paths with ease. Hope this help. Great tutorial!
i’m also stuck the same with nick. can you clear that instruction? this tutorial is nice but we’re stuck on that part. thanks!
Ethan has given the answer please read that at the bottom.
Yeah I’m pretty stuck on this one. I get up to the point after I’ve hit Minus Front on the circles and the inner object, all good. But, when I try to unite the second pair of circles and the outer object, the stroke of the circle doesn’t join seamlessly with the corner of the outer object, it cuts off early. And also there are weird dashed lines continuing where the circle would have been between the inner and outer object.
Kindly delete the extra layer and unite. It will work for sure.
Nice tutorial, I have gone through each step and make badge similar to yours but I ave a concern….
How do you put shadow under the banner
kindly help in this regards
Thanks
Nice to hear that. Shadows are easy. Just go to Effect > Stylize > Drop Shadow. Play with opacity, Offset and blur and you will get a nice drop shadow underneath the badge.
Hi Zee, My problem is the stokes under the 100% guaranteed line. Do I have to draw a curve one or can I mesh straight ones? Thank you!
problem solved 🙂 sorry, it was a dumb question 🙂
Glad you figured it out 🙂
Hi
after minus & unite step, the left part is not really rounded ???
Kindly “Object > Expand Appearance” before minus and unite them so you can keep the rounded shape
After expand the appearance & when i minus the object.
!!!
The filter produced no results. Please select two intersecting paths.
What should i do?
There must be some extra object kindly delete it and then proceed.
You need to explain the steps better. I cannot get the paths to minus after grouping them. You have fixes in the comments section that are not working either. I keep getting distorted circles or they disappear all together. Please edit your tutorial with the right procedures.
Sure let me do it again.
Text Part missing
Can you elaborate which part is missing?