There are many different ways to create a website, but the most popular, and the one used by most people who are serious about having a great website, is as follows:
They hire a graphic designer to create the appearance of the website first. Then when the client is content with the look, he hires a developer to convert that design into hand-written HTML code.
This method is advantageous to developers, but not so much to designers. 70% of the total money spent by the client goes to developers, and designers receive only 30%.
However, Webydo is set to change that.

Webydo’s website creator software is intended for professional designers. Using Webydo they can create quality websites for their clients without needing any coding or programming skills. Webydo completely eliminates the need for coders because its system generates the necessary HTML code as the designer is designing the website.
Let me give you a brief introduction on how to create a website with it.
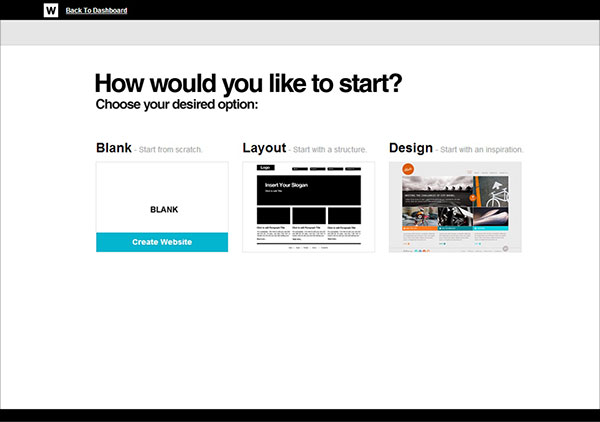
First of all you will have to register for an account and then sign in. Then you will be shown three options to choose from – Design, Layout and Blank.
I chose the Blank option and began designing.
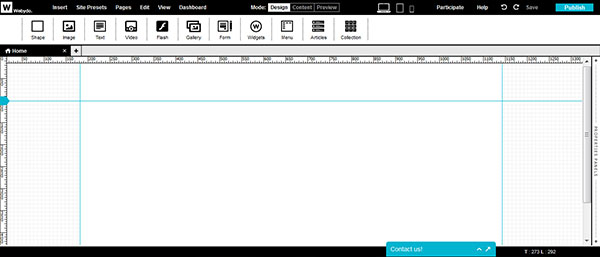
Initially the screen looked as shown below. As you can see, the page is entirely blank.
First I needed a good header. I clicked on the Image option and a rectangular box appeared on the screen as shown below.
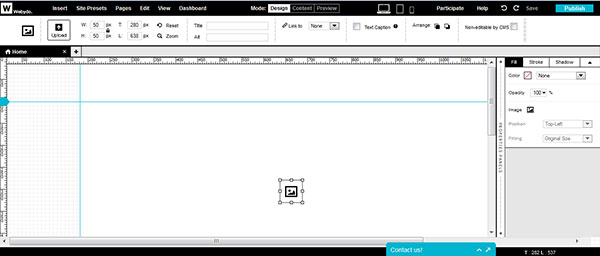
I clicked on the small image icon inside this rectangle and uploaded an image from my computer’s hard drive. Then I used the drag-and-drop feature built into the Webydo’s system, which lets me drag any element anywhere on the page and then drop it wherever I want it to appear on screen.
I also clicked on the edges of the rectangle and then pulled them in the direction I wished them to increase or decrease. Eventually, after all these adjustments the screen looked like as follows.
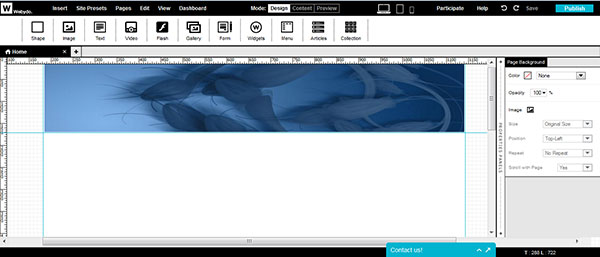
So my header is in place.
Now I would like to add in a widget using HTML code. Suppose I wish to publish a list of names as first names and surnames along with the points they scored in a game in tabular form.
I clicked on the Widgets option and then on HTML. A rectangular box appeared on the page and note that the right side bar changed and displayed a section to enter the HTML code.
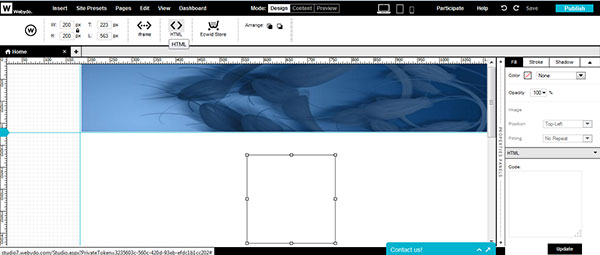
I pasted my HTML code in the box in the right side bar and then hit the small Update button below. Note that this is important. You should paste the code in the box that appears in the right side bar and not in the box that appears on the page.
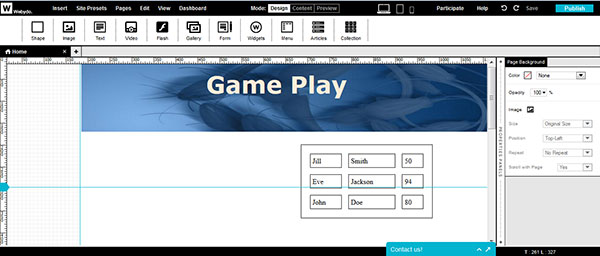
The screenshot above shows how the page looked after the submission of HTML code. Yes, in the meantime I also sneaked in my website’s name – Game Play. Don’t you like it?
Now I also need the tabs for different pages. I clicked on the Menus tab and I got a bar made up of different tab names. I adjusted it to come below the header as shown below.
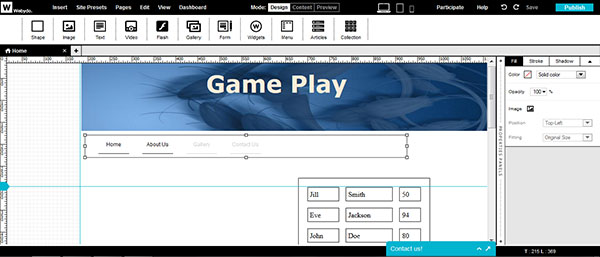
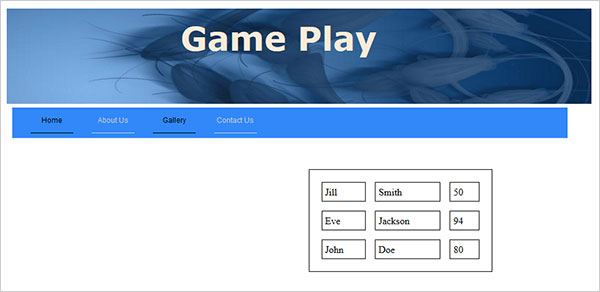
I wanted the background color of these tabs to resemble that of my header, and hence I chose the light blue color for it. So after all this, I published the website and the final page of the site looked as shown below.
Note that this article was just a brief introduction to the Webydo dashboard. The more time and energy you invest in it, the better you will get at it, and the better websites you will design.
You can join the professional website design software Webydo’s 73K professional designer’s community today by signing up for a Free account and starting your creative design project and enjoying the freedom of creativity. Let us know your thoughts in the comments below.

This article is proudly presented by Webydo’s professional community of designers.
Recommended Posts:
- Changing Trends of Website Designing
- A Showcase of Creative Website Design Landing Pages | An Eye Opener For Designers
- 10 Best Free Responsive WordPress Themes for Business Websites 2014
- 5 Mistakes in the Wesbite Mockup Creation Process