When it comes to enhancing your favorite snapshots, whether it be for that perfect holiday photo album or those treasured family stills, Adobe Photoshop remains a top player in today’s ever-expanding world of image enhancement. In fact, studies show from a recent article published by Business.com¹, that Photoshop as of its 20th anniversary in 2010 “had more than ten million users worldwide.” So it’s no wonder the software remains the go-to place for those looking to bring out the best in their images. In this article we’ll cover some of the simplest yet most effective ways on how to Photoshop pictures so you can give it a try too.
Firstly, when we’re working with this software there are a couple of key terms we use when referring to how to edit photos in Photoshop. These are terms you’ll hear being used frequently as we go on and they are “destructive edits” and “non-destructive edits”. What do they mean? Well, exactly what they refer to. Editing destructively simply means editing photos in a way which makes permanent changes to them. Often these changes are made early on so you may not be able to restore an original aspect of the image if you don’t like how it turned out at a later point. This is one of the worst Photoshop actions you can make for precisely that reason. However, creating non-destructive edits allows you to apply artistic photo effects and is one of the best Photoshop actions you can take.
How to Photoshop Pictures
Once we have our image opened and ready to go, one of the first things that’s always a good idea to do is to make a copy of our picture. Do this by right-clicking on our “Background” layer and hitting the “Duplicate Layer” option.
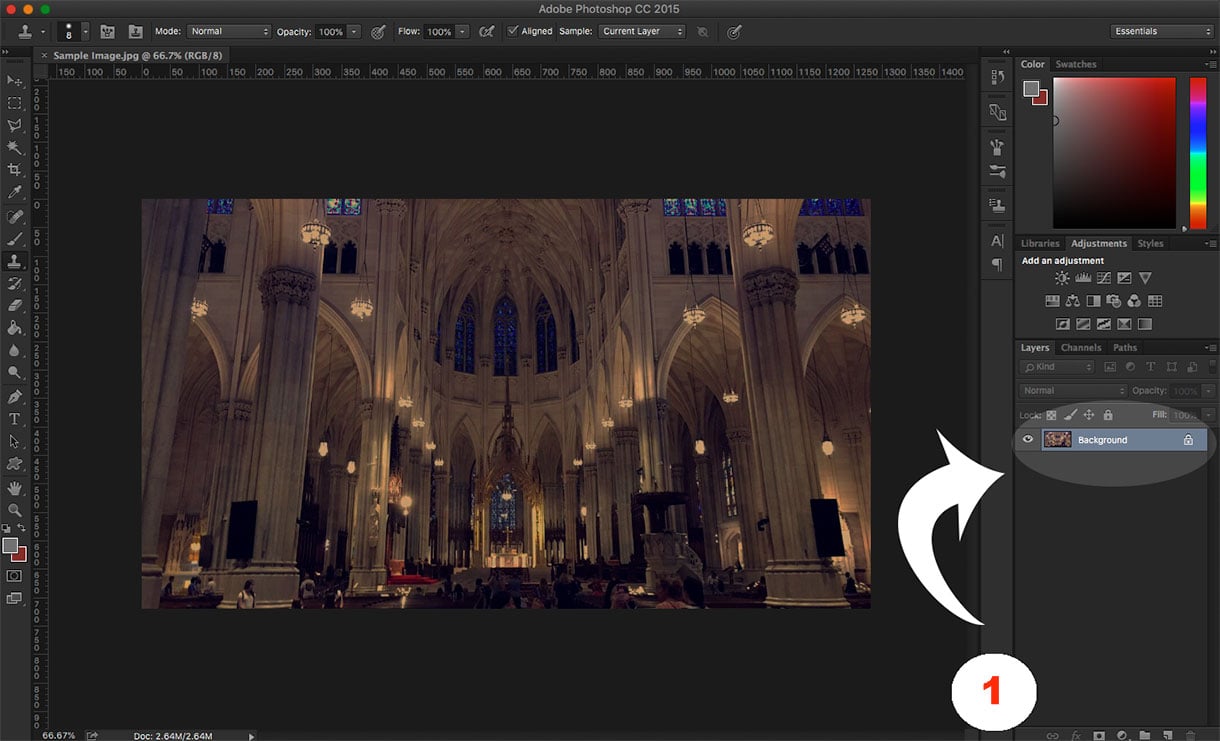
(Right click on Background layer)
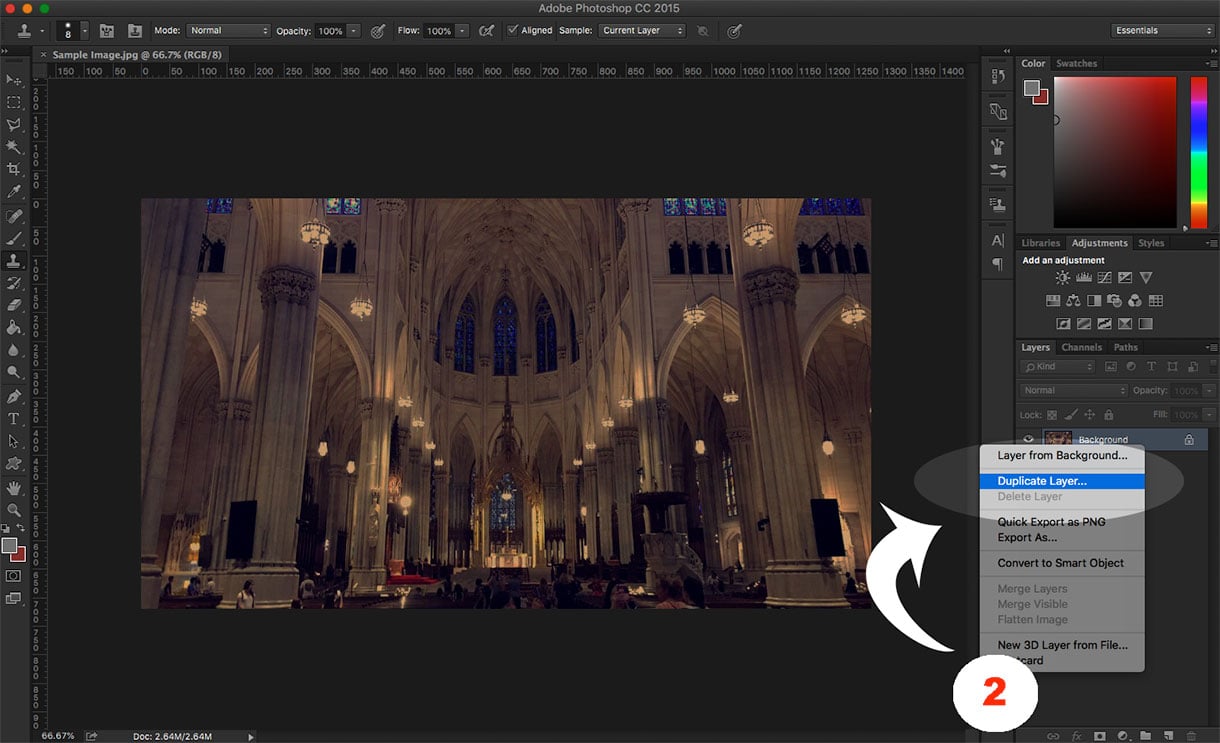
(Select Duplicate Layer)
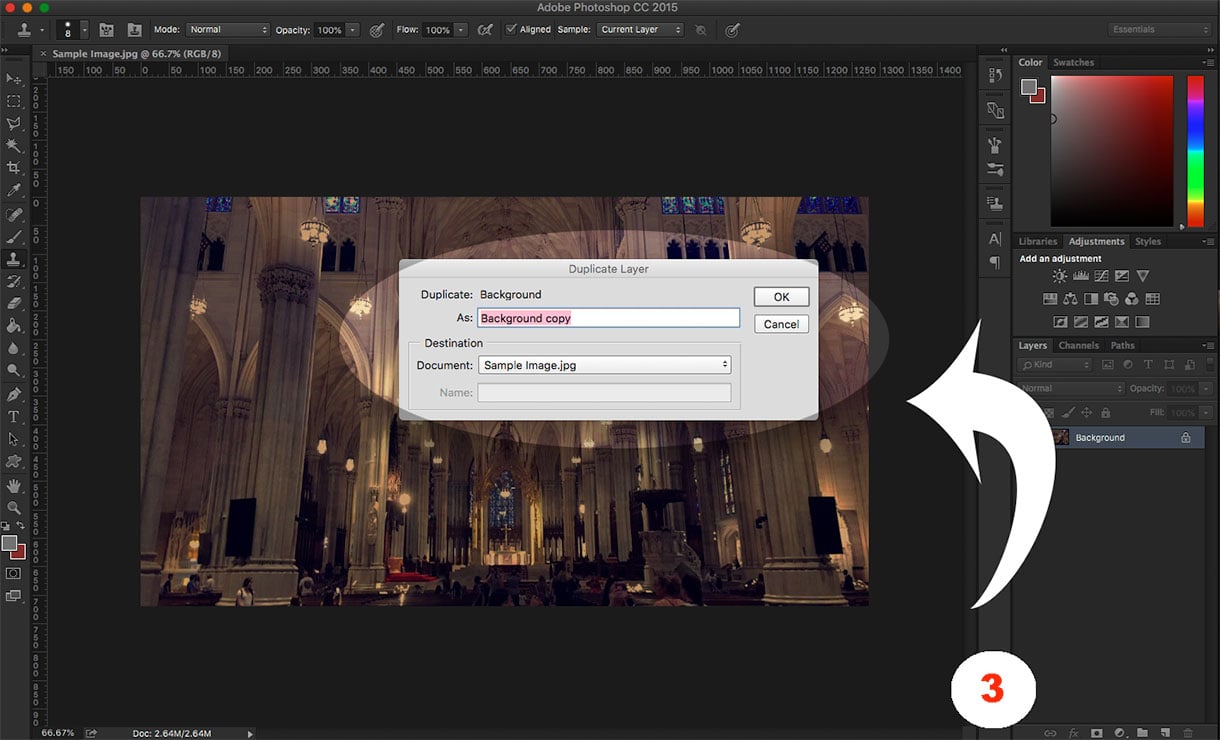
(Hit OK to create new Duplicate Layer)
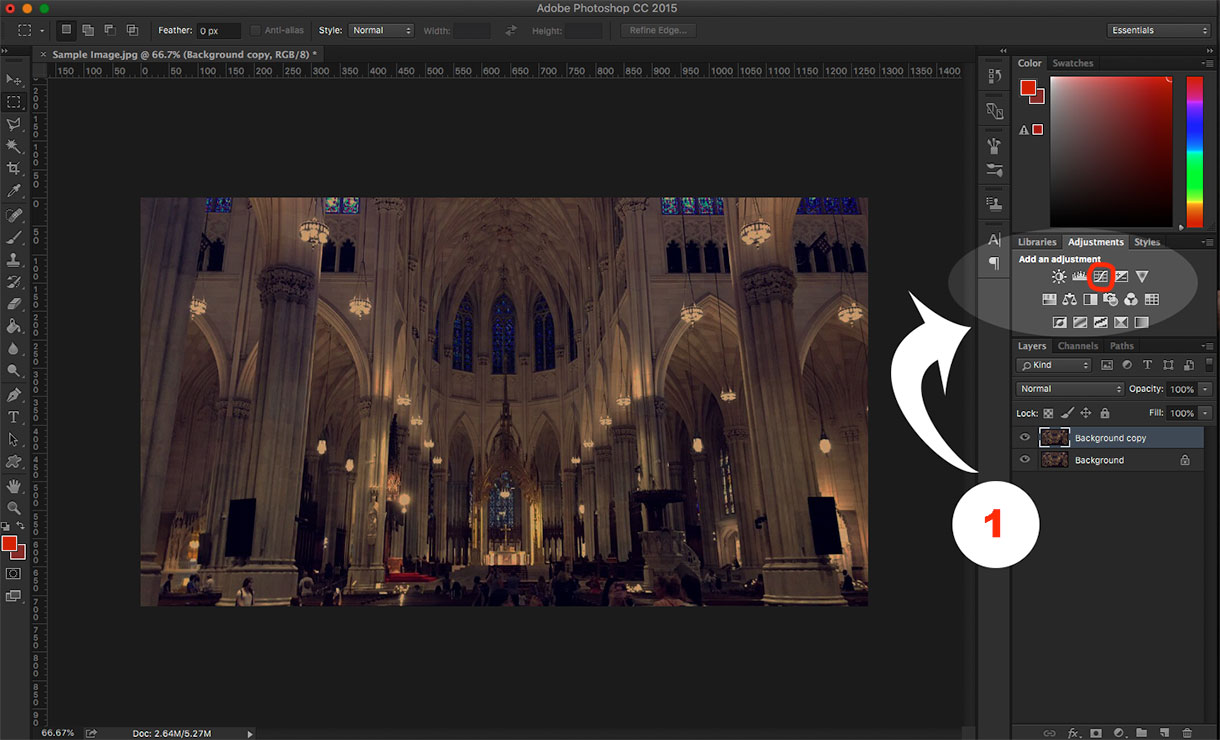
Next we move on to achieving our creative goals with our image. We’ll be utilizing “Adjustment Layers” here as they are the key to how to edit photos in Photoshop non-destructively. At this point, we ask ourselves what we want to accomplish and which artistic photo effects do we want to apply.
Using the “Levels” Adjustment
Take for instance our sample image here. We can already see that because we’re inside an enormous open-plan cathedral, the lighting is extremely limited. You might find yourself in a similar situation with your indoor shots. So, which are some of the best Photoshop actions we can apply to brighten up this dim indoor shot without overexposing our image? Why don’t we start with adjusting our “Levels”. These help to bring out our natural brights and darks, without taking too much away from either side.
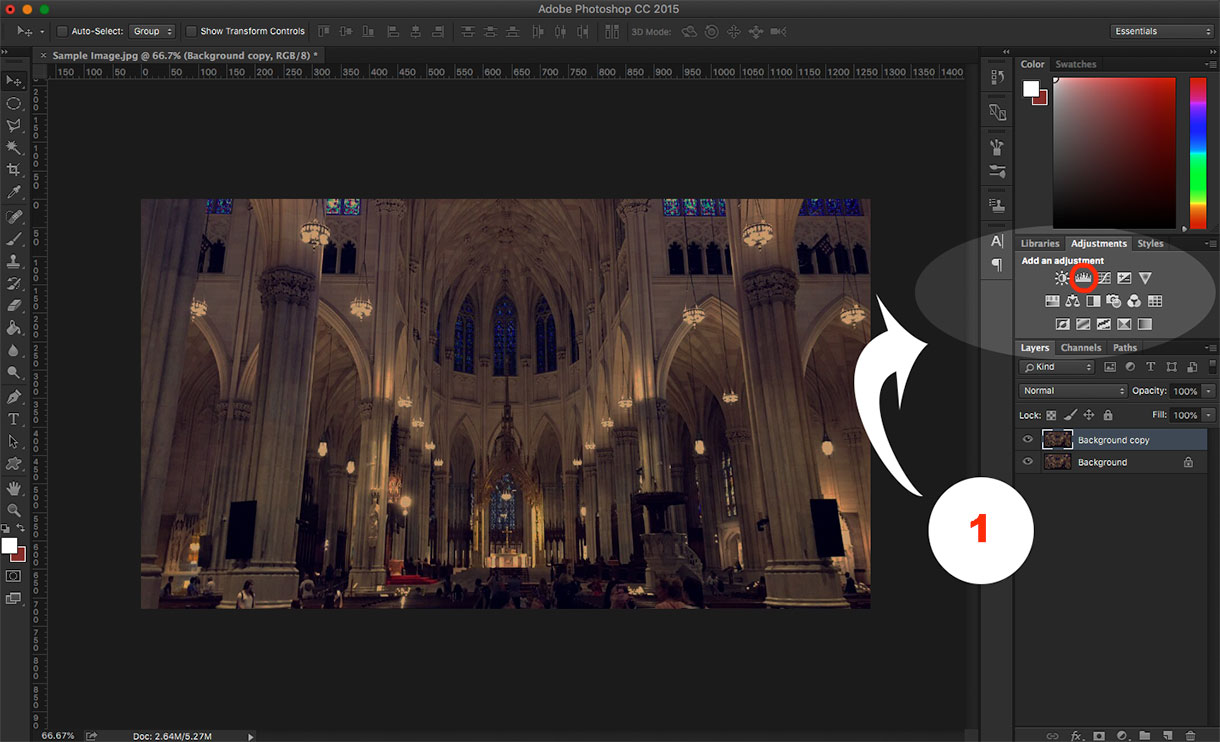
(Circled is the Levels Adjustment feature)
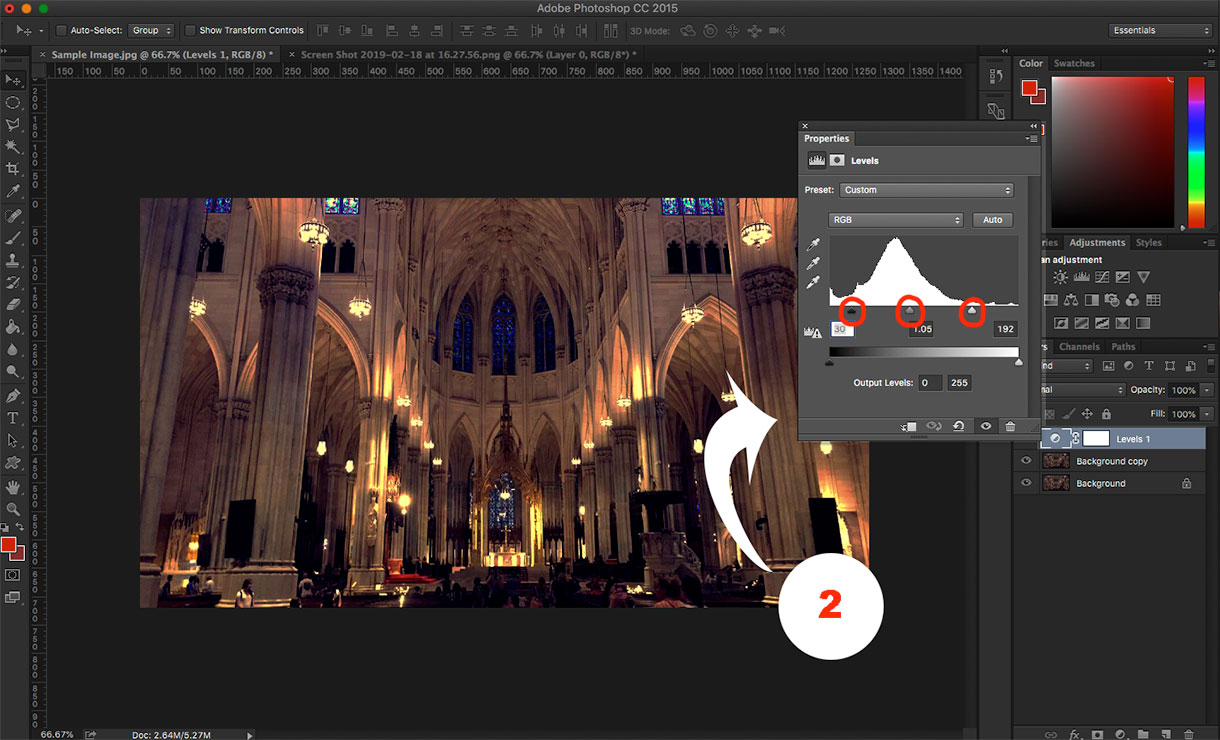
(Shadow, Midtones and Highlights Sliders)
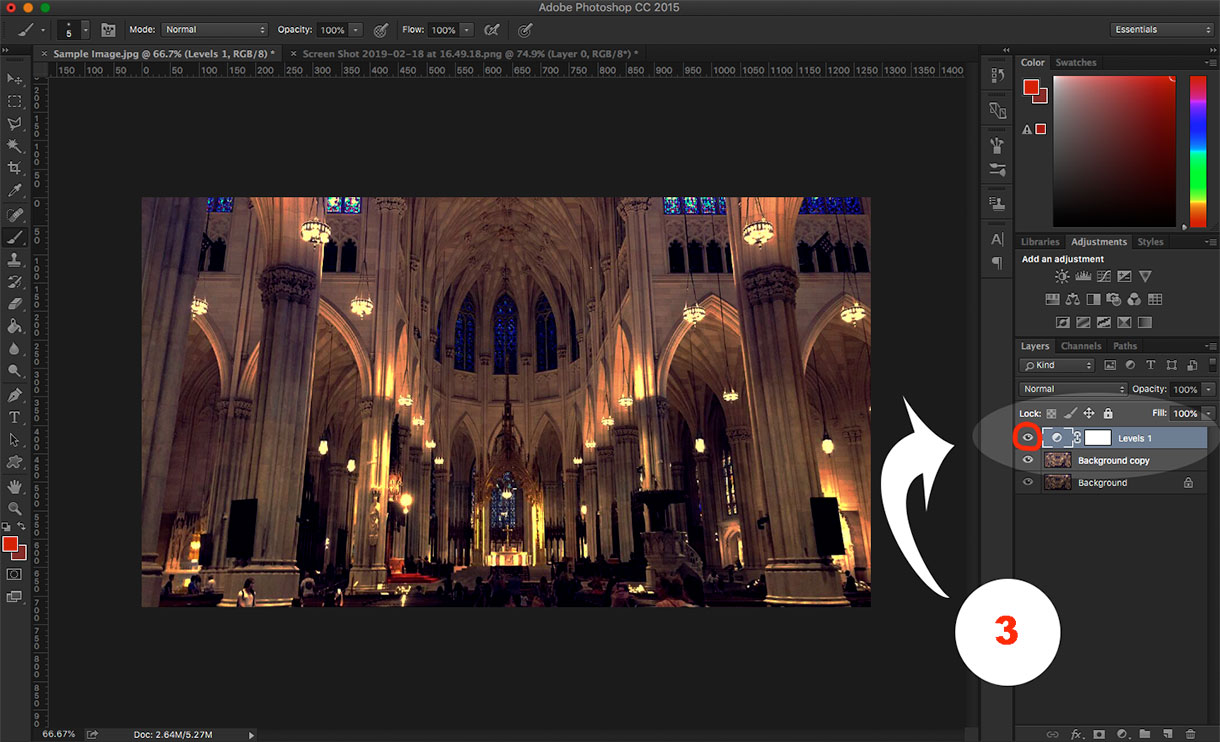
(Hit the Visibility icon to deactivate effects on any layer)
Simply select the “Levels” Adjustment and it will become a new Layer. From here we can adjust the sliders across from each side of our graph. You will begin to see the image’s lighting shift as you adjust freely; just a simple little way you can adjust lighting when learning how to use Photoshop. Don’t like your changes? Simply hit the little eye next to your Adjustment Layer and its effects become invisible.
Using the “Curves” Adjustment
So what about colors? Photoshop has a neat little feature known as “Curves” and adjusting these allow us full control over our image tones. Enhancing the colors in our image through the “Curves” tool is one of the best Photoshop actions we can take as, just like “Levels”, we have access to a slider which we can adjust manually. So, say in our sample image we again have our cathedral. One or two of our dominant tones and colors would be a yellow or an ivory, as reflected in its massive stone walls. You may find yourself taking snapshots of architecture or buildings on your travels so here’s how to edit photos in Photoshop, through enhancing their tones and colors.
(The Curves Adjustment icon as circled)
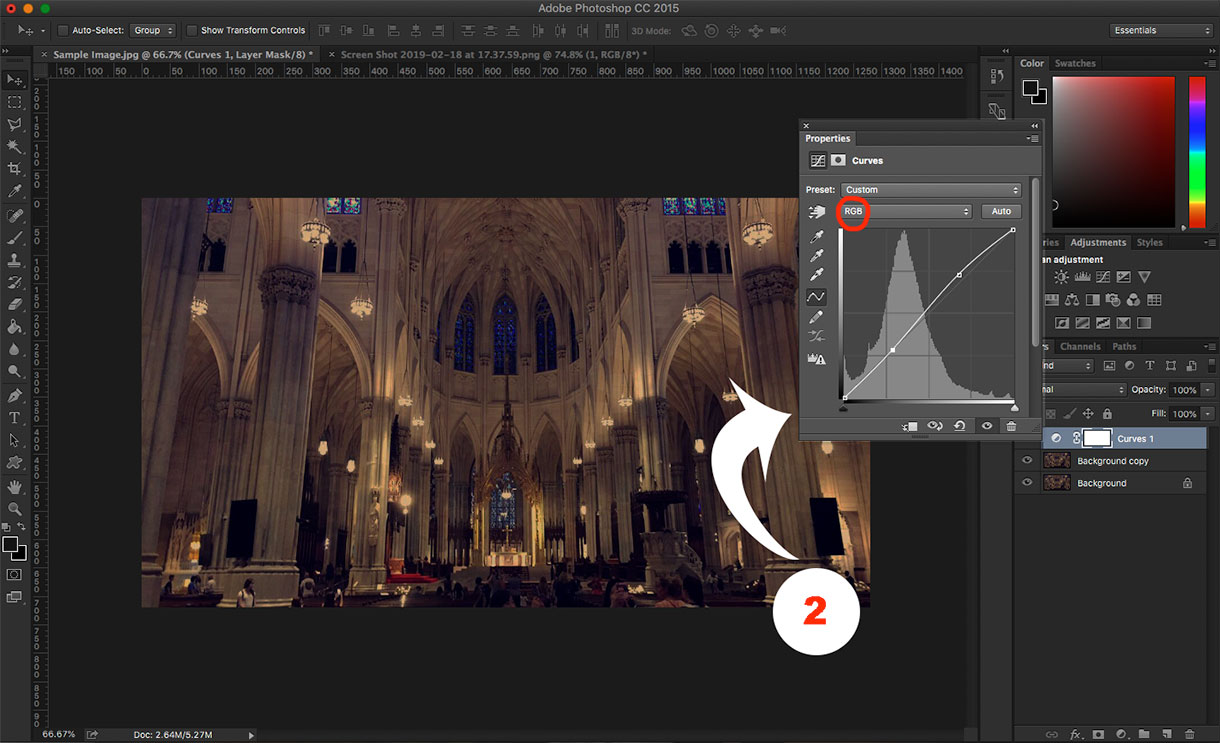
(Select color adjustment mode from the drop-down menu)
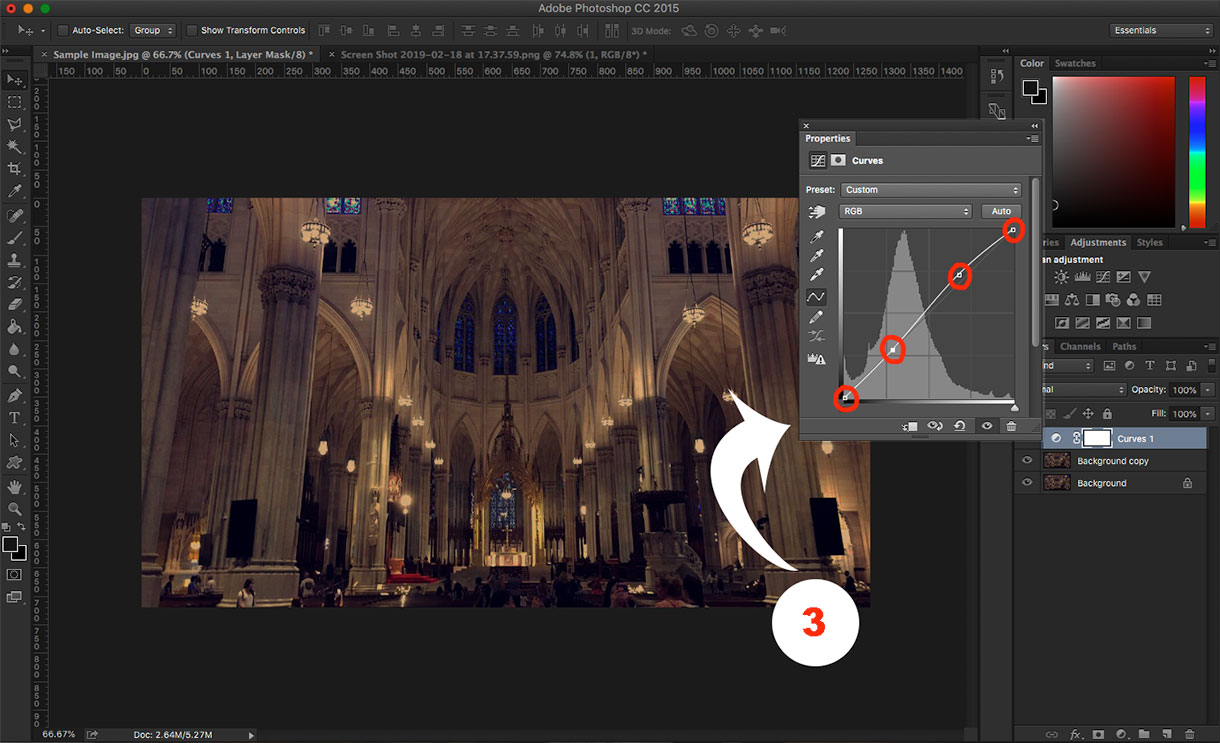
(Various anchor points allow for tonal adjustment)
The “Curves” Adjustment appears just to the right of “Levels” and by selecting it, we will once again be creating a new layer to ensure non-destructiveness. Our new graph which appears allows us to adjust the tonal variety of the selected color mode, in this case we’re going to stick with the “RGB” setting as this gives us a general adjustment and is probably one of the more suitable Photoshop actions for this particular image, given that we’re working with fewer colors. To adjust, simply drag and pin the anchors as circled. This provides a spectrum of control over a variety of tones and is one of the simplest artistic photo effects you can apply to enhance your shot.
Brightness, Contrast & Vibrance
The “Brightness and Contrast” Adjustment gives the user an even more simplified tool for bringing out those stubborn dark areas in an image. Particularly, “Contrast” is a tool we can use to make sacrifices in either the image’s tonal variety or its clarity. Meaning, adjusting the contrast to a lower setting will withhold tonal richness and enhance image clarity, while increasing contrast will do the exact opposite: a photo richer in color tones such as clearer darks, but lower in lighting and clarity. A key rule when knowing how to Photoshop pictures while using these tools effectively, is “light reveals, black conceals.” So it’s best to know what you want out of your image beforehand.
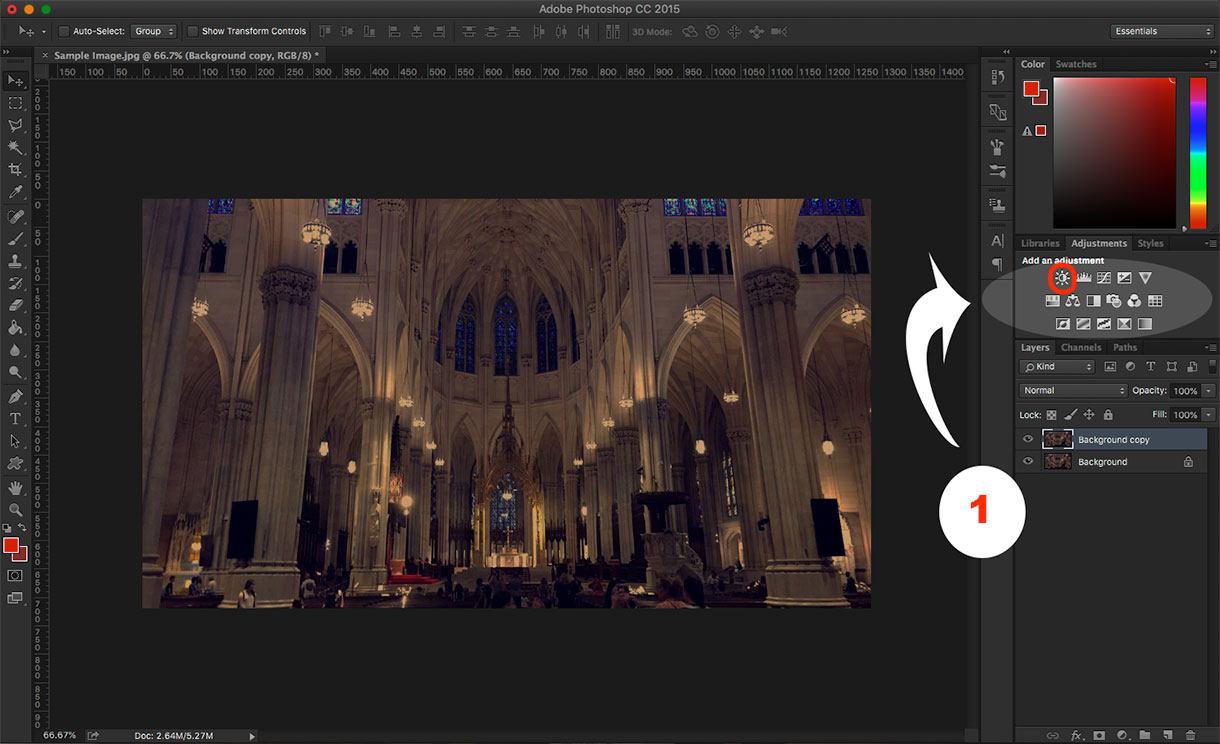
(Brightness/Contrast icon appears just to the left of Levels)
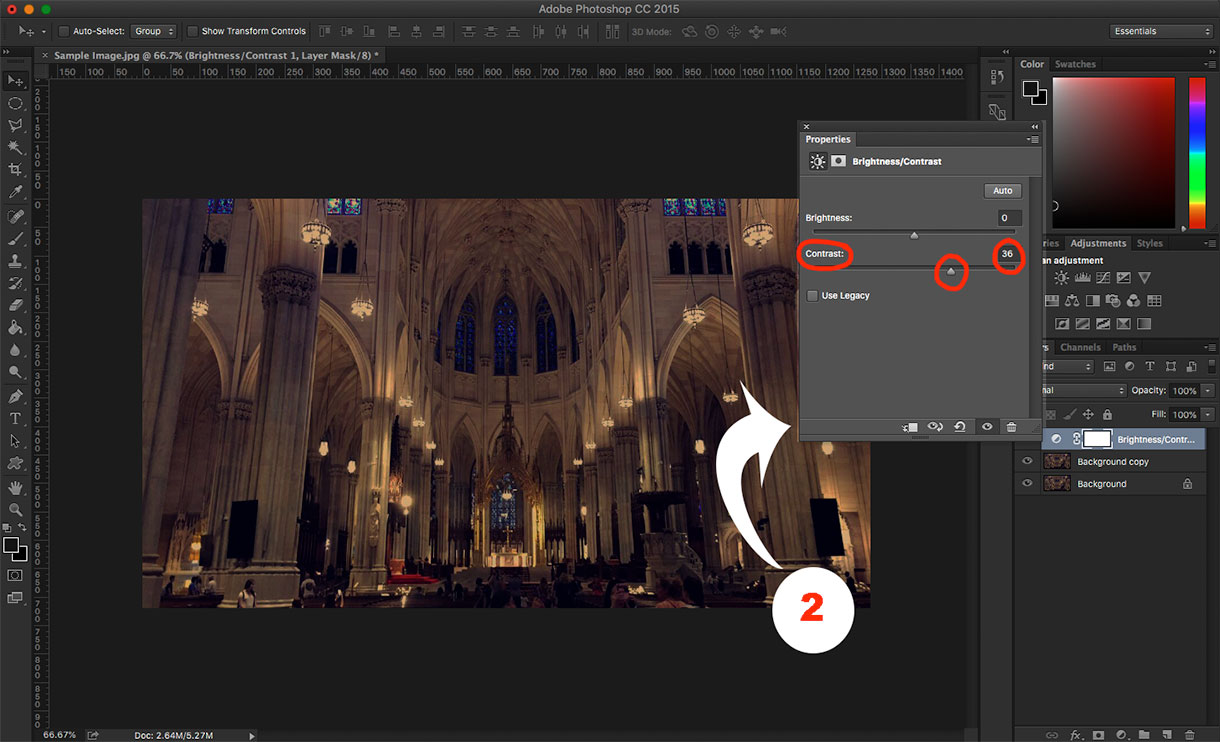
(Contrast slider allows for easy adjustment)
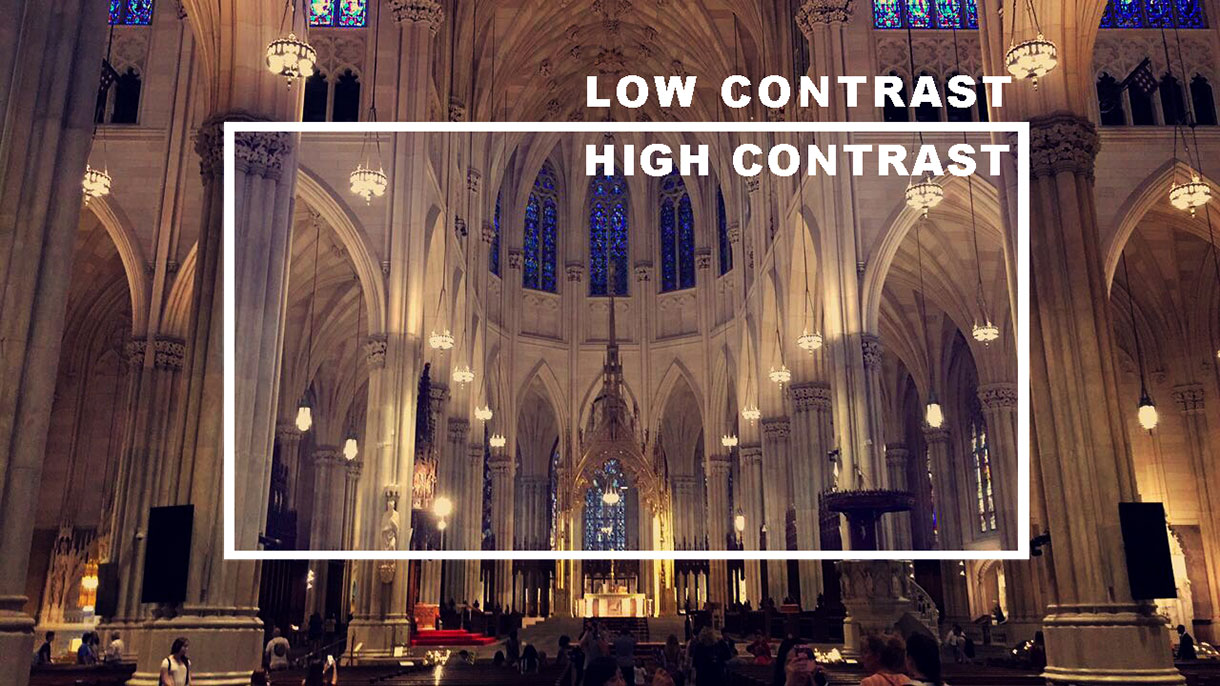
(Low versus High Contrast comparison)
Vibrance, on the other hand, tends to target the reds, greens and blues in an image. By increasing Vibrance on an image of a sky, for example, you can guess as to the areas which will most drastically be affected.
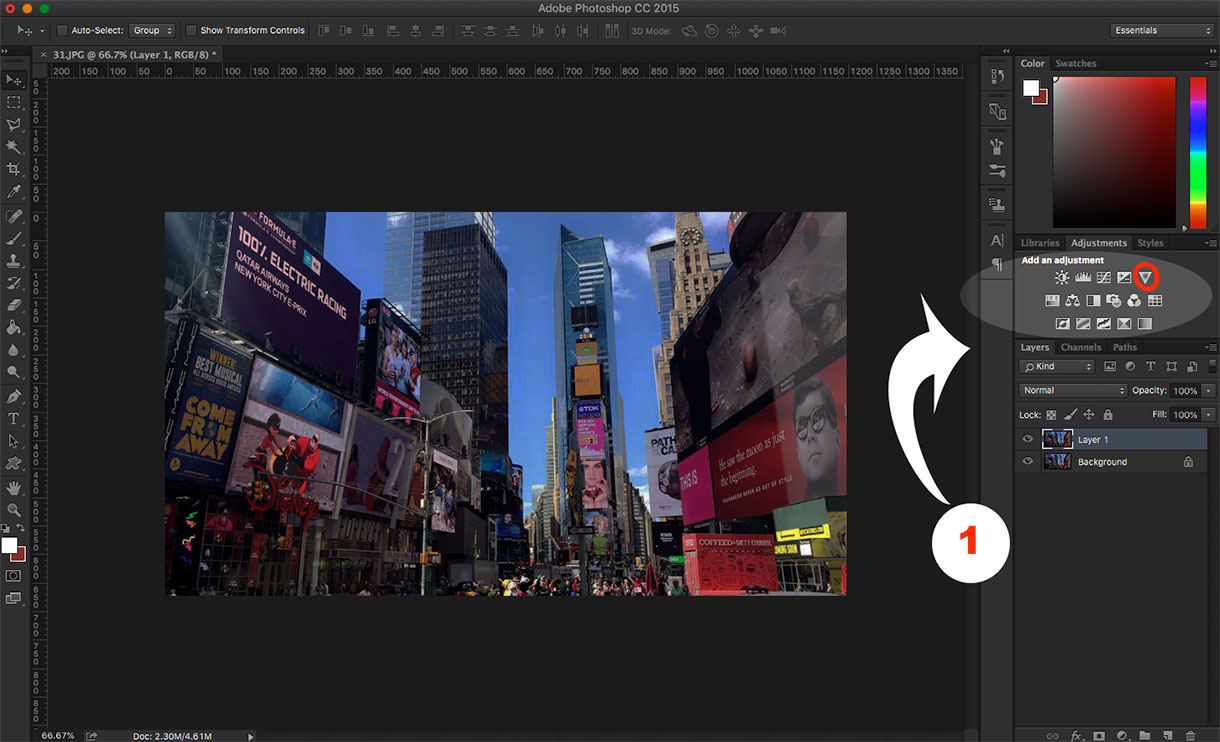
(Vibrance icon can be found to the far right of the Adjustments panel)
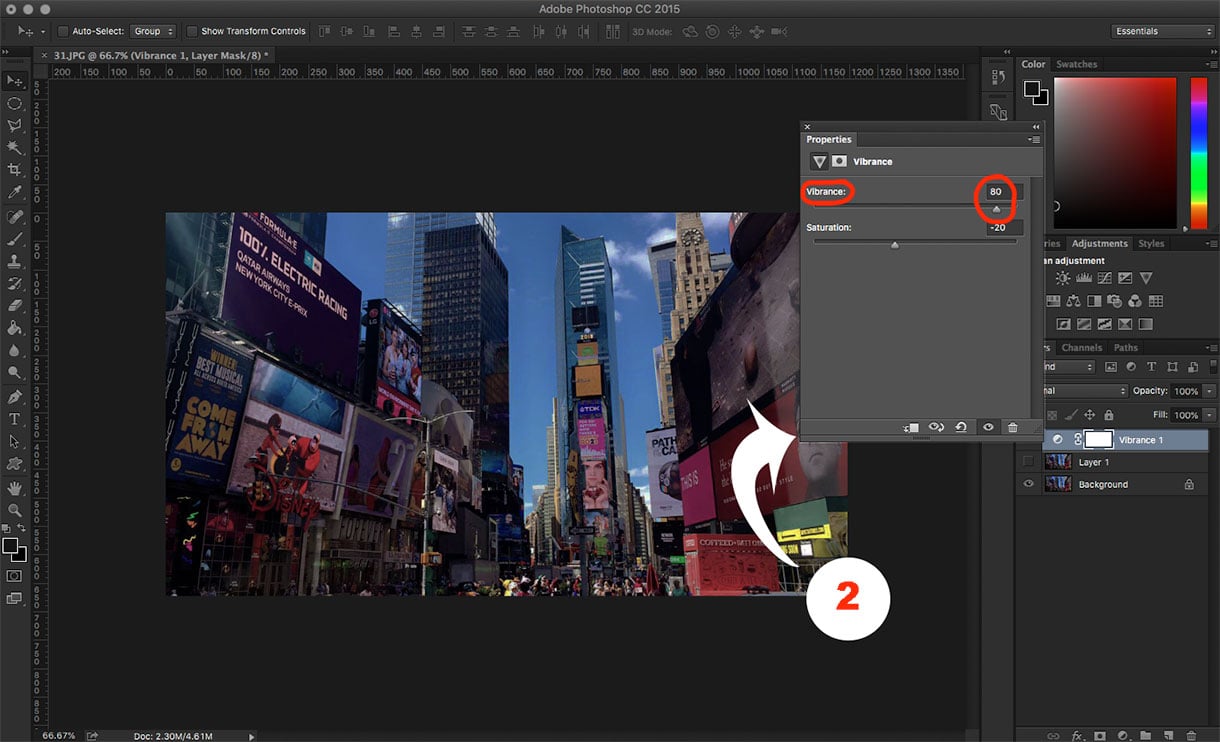
(Vibrance slider provides simple access to RGB tones)
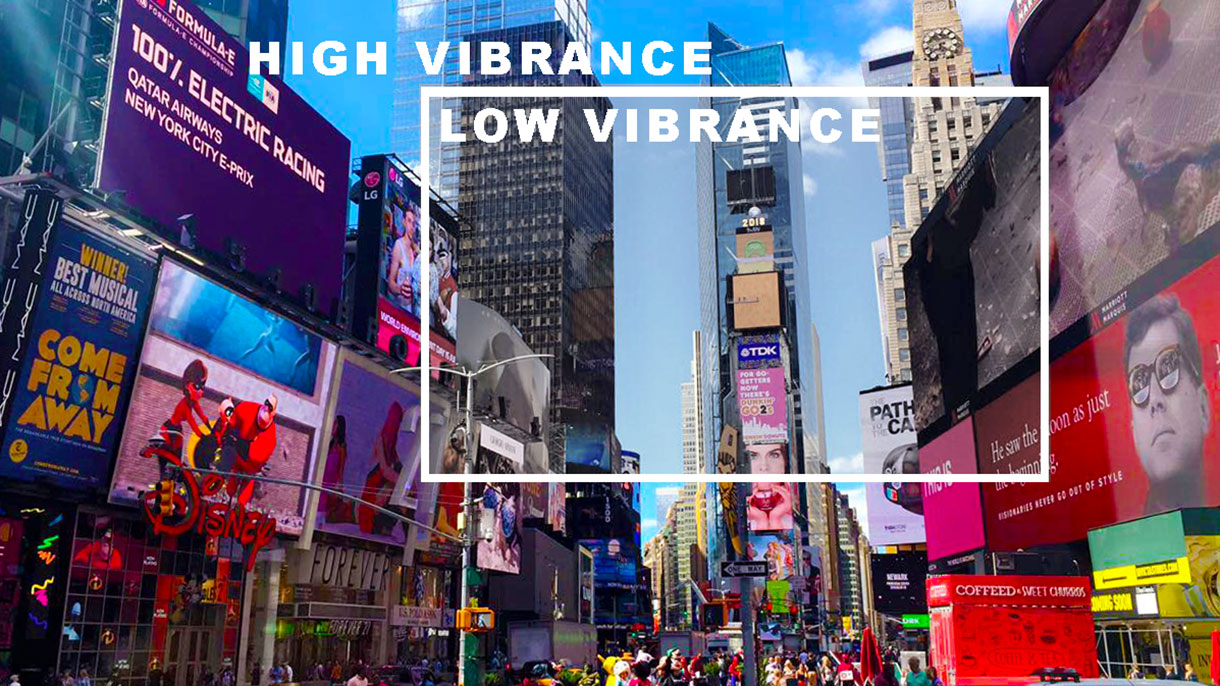
(Low versus High Vibrance comparison)
Increasing or decreasing either these Adjustment tools can radically change your images tones, sometimes resulting in overexposure or dimness. As such, it’s best to apply these Photoshop actions cautiously to avoid disappointment when it comes to the question of how to use Photoshop.
Image Retouching with the Clone Stamp and Healing Brush
Now that we’ve got the essentials down to tasks such as light and dark adjustment and color enhancement, we should already be on our way to bringing out the best in our favorite photos. What about how to use Photoshop to remove unwanted features in an image like, say, a scar that didn’t heal in time or a wandering tourist ruining that perfect shot? Well the Clone Stamp and Healing Brush are your best friends for that and the good news? They’re incredibly simple to use and some of the best Photoshop actions for the job. Both of these awesome features can be found in the Tools bar to the left of your interface.
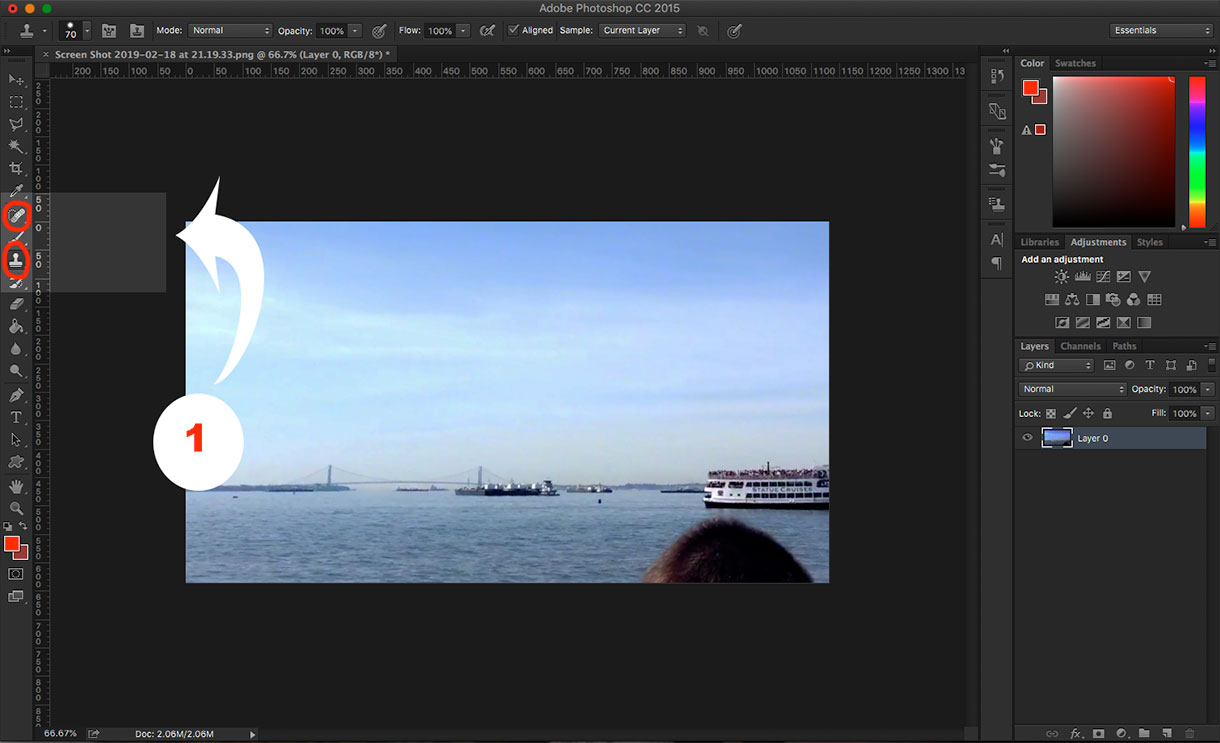
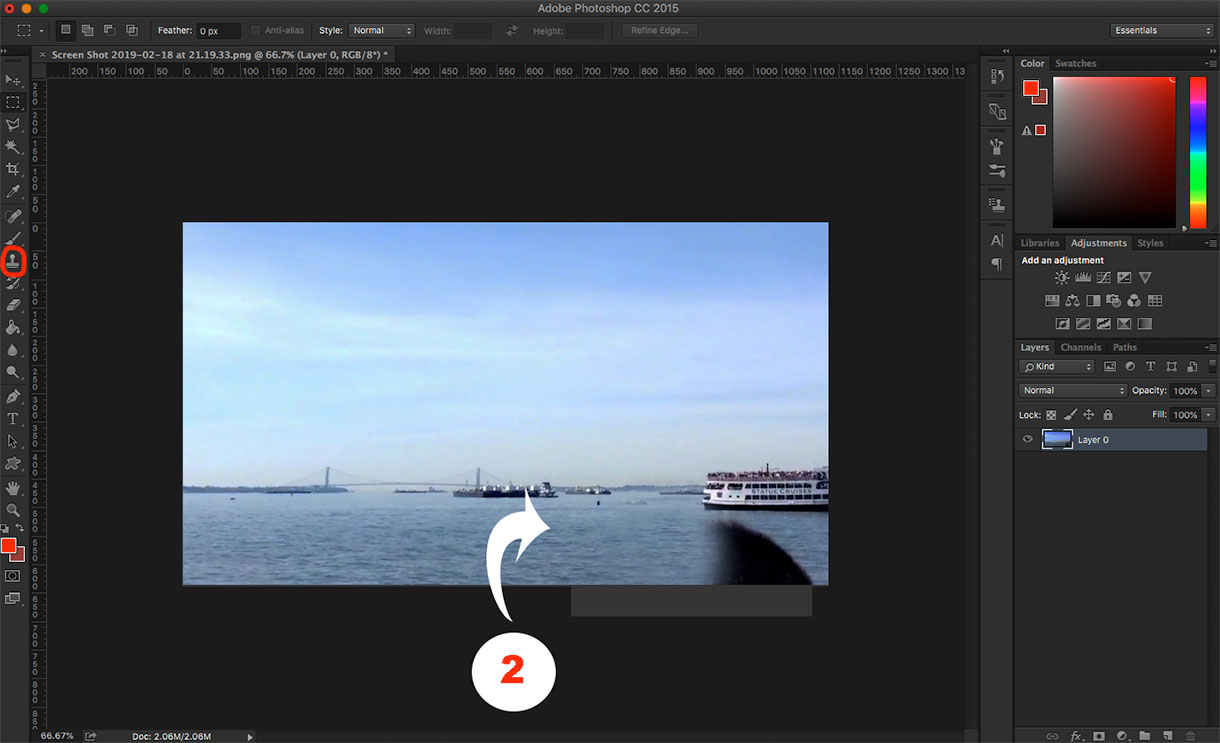
(Clone Stamp and Healing Brush Tool appear to the left in the Toolbar)
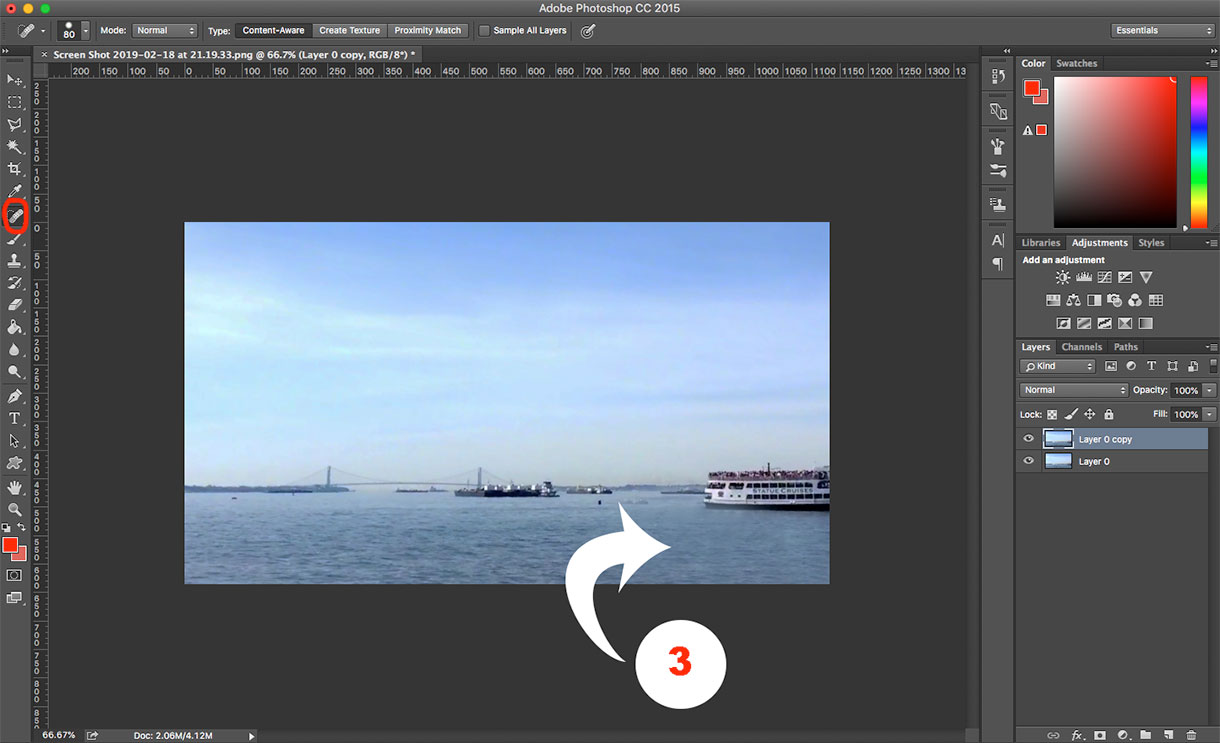
Here we have a perfectly regular image but a tourist’s head lays unwanted in the foreground. By selecting the “Clone Stamp” we’re going to define a source point to copy using the Alt/Options key on Windows or Mac and then paste over the area being blocked by the tourist’s head. As you can see in the next image, we’ve chosen the nearby water as a source point and we’re going to paste over the unwanted contents.
(Selecting the nearby water as a source point and pasting over unwanted area)
After the area has been pasted over, there may remain some inconsistencies in the target zone, this is where the “Healing Brush” tool comes in as essential to achieving a realistic look. Unlike the Clone Stamp, the Healing Brush doesn’t require you to select a source point. Not bad at all!
(Cleaning over area with Healing Brush tool to restore naturality)
So there you have it. Just some of the many available artistic photo effects and tools you have at your disposal. And as you can tell, it’s all fairly straightforward. No intricate learning or Photoshop masterclasses required. With Adobe reporting over 90% of the world’s creative professionals using Photoshop², maybe it’s time you let the creative juices flow while having all bases covered on how to Photoshop pictures by adding these very tools to your own skill set.
– – – – –
Sources:
- Business.com, (2017, February 22). Photoshop Reigns Supreme: How the Software Has Maintained Market Dominance. Retrieved from This Link
- Adobe.com, (2019). Adobe Fast Facts. Retrieved from This link
– – – – –
Contributor: Kushal Gandhi | Kushal is a passionate blogger and a content strategist for DealFuel.com. He likes to keep himself updated with the latest trends in the field of design and technology. Loves coffee, listening to music, and playing soccer.
– – – – –
Recommended Articles:
- 25 Must Learn Adobe Photoshop CS6 & CC Tutorials To Enhance Photo Manipulation Skills
- 20 Must Learn Adobe Photoshop CS6 & CC Tutorials To Enhance New Skills
- 10 Cool Yet Fresh Adobe Photoshop CS6 & CC Tutorials for Newbies & Beginners
- 20+ Latest Adobe Photoshop CC & CS6 Tutorials to Learn
- Top 10 Best Adobe Photoshop CS6 & CC Video Tutorials for Beginners to Enhance Skills